Ad Dns Setup
Title: “Active Directory Domain Services (AD DS) and DNS Setup on Windows Server 2022” Date: 2026-04-23
Categories: [Active Directory, Windows Server, DNS] Tags: [active directory, dns, windows server, ad ds, setup]
DNS Configuration
Since we are using our Domain Controller server as a DNS server also, there is not much benefit on using standalone internal DNS Server. So, we will use the same server for both AD DS and DNS services. After the installation of Active Directory Domain Services role, the DNS server role is also installed. Now, we need to configure the DNS server for our domain.
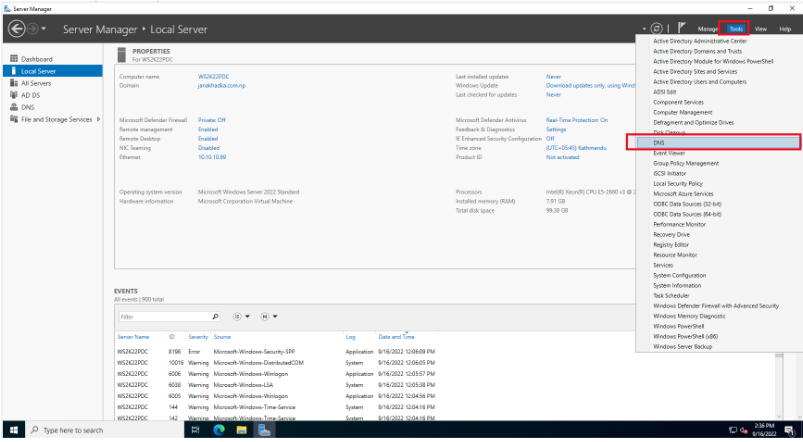
- Open Server Manager and then click on Tools and then DNS to open DNS Manager.
- In the DNS Manager, expand the server name you can see the forward lookup zones , reverse lookup zones and other options. We now need to create a Reverse Lookup Zone for the domain. Right click on Reverse Lookup Zones and then select New Zone
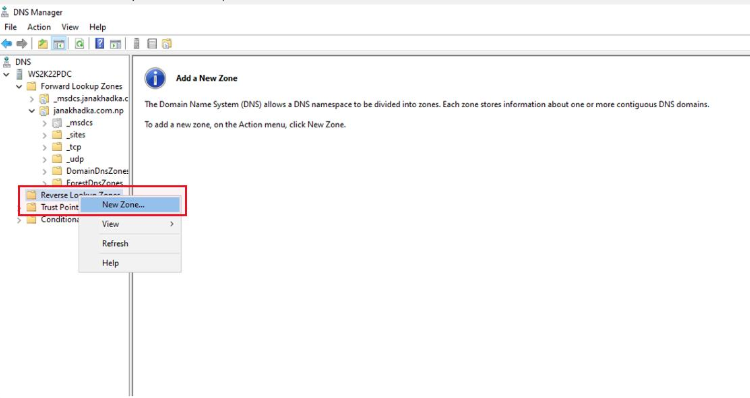
- On the New Zone Wizard, click on Next to continue.
- Select Primary Zone and then click on Next.
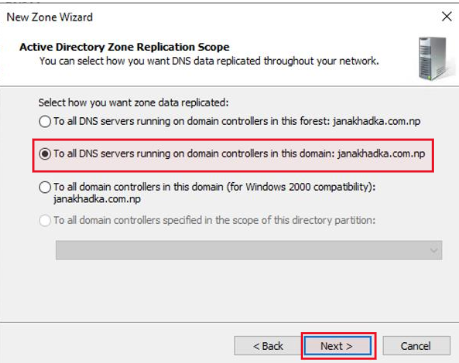
- Select To all DNS servers running on domain controllers in this domain: MrMark.local and then click on Next.
- On the Zone Name page, select IPv4 Reverse Lookup Zone and then click on Next.
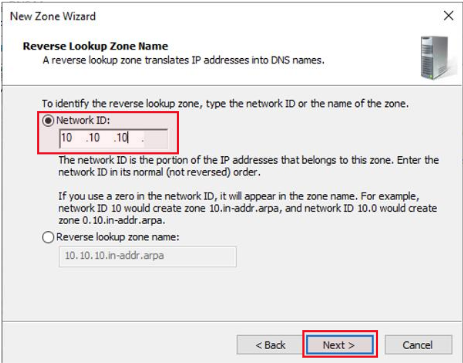
- On the Network ID page, enter the network ID for your domain. In my case, the network ID is 10.10.10 and then click on Next.
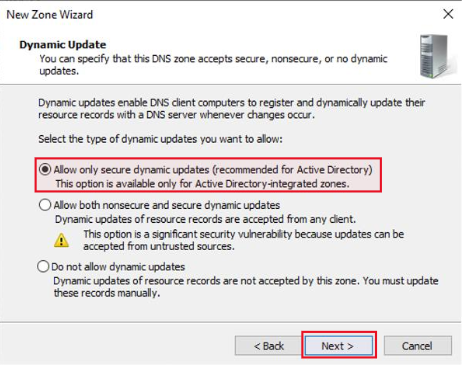
- On the Dynamic Update page, select Allow only secure dynamic updates and then click on Next.
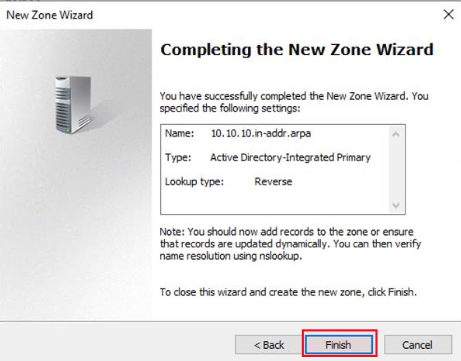
- On the Completing the New Zone Wizard page, click on Finish to complete the creation of Reverse Lookup Zone.
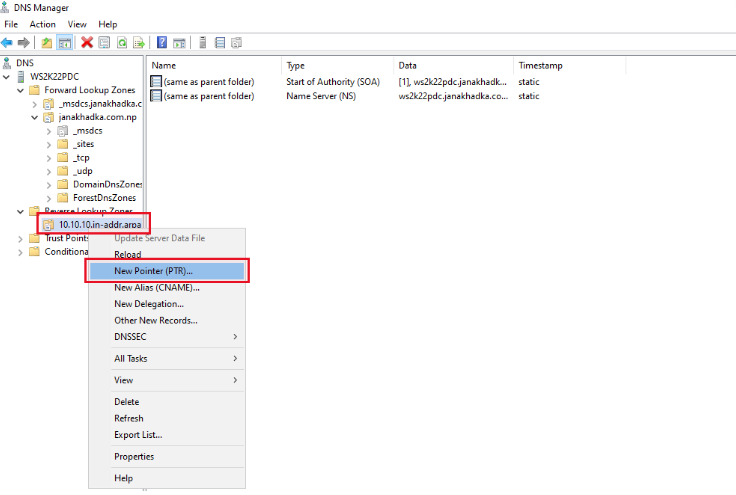
- Now, We can now see the reverse lookup zone created. To continue the DNS configuration, need to right click on newly created reverese lookup zone (in my case, it’s 10.10.10.in-addr.arpa) and select New Pointer (PTR)
 In the New Resource Record page, complete your server’s IP address in Host IP Address section and browse for the server Hostname section. After completing it, click on Ok.
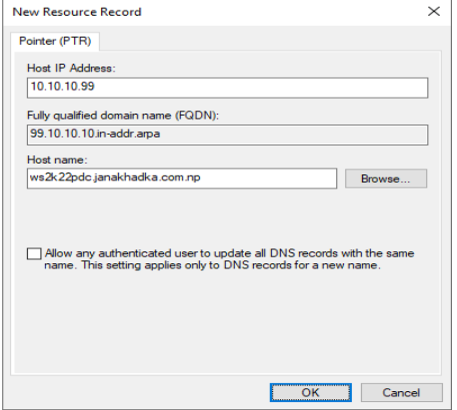
Verify the DNS server configuration
To verify the DNS server configuration, we can use the nslookup command. Open Command Prompt and then type the following command:
nslookupnslookup mrmark.local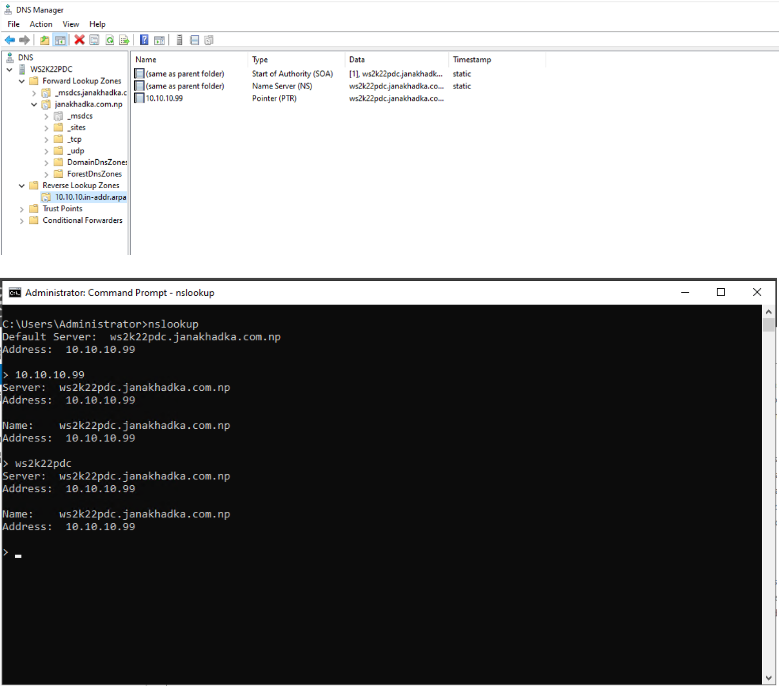 If the DNS server is configured correctly, you should see the IP address of your Domain Controller server in the output. In my case, the IP address is 10.10.10.99. This means that the DNS server is configured correctly and it is able to resolve the domain name to the IP address of the Domain Controller server.
Conclusion
In this post, we have learned how to setup Active Directory Domain Services and DNS server on Windows Server 2022. We have also learned how to verify the DNS server configuration using nslookup command. In the next post, we will learn how to create users and groups in Active Directory and how to manage them using Active Directory Users and Computers (ADUC) console. Stay tuned for the next post!